1. 3rd Party Software
1.1. ELO Touchtool Drivers and Software
Environment:
Vector, Vector Plus, Sync CNS
Applicable Version(s):
Windows XP through Server 2012
Description:
Latest ELO Drivers for use.
Applicable Files:

EloDriver_Svr2008_5.8.0.exe

EloDriver_Svr2012,W10,W7,WXP_6.9.7.exe 

Related Information and Links:
N/A
Revision Date:
09/18/2017 - Released to KB.

 
1.2. External POS Systems
1.2.1. Approved EPOS Vendors
Environment:
External POS Interface
Applicable Version(s):
Vector Plus CNS and Sync CNS
Document Description:

The following vendors are approved for the EPOS Interface:

 POS System Minimum Version  Highest Tested Version  VP Supported  Minimum VP Version  Sync Supported Minimum Sync Version Vendor NotesSupport Contacts
Agilysys by InfoGenesis ? ? ? 2.8 Yes 1.9 Certified by Brunswick on 11/5/2018  
Aloha POS
12.3.5 12.3.5
See Notes 2.8  See Notes 1.9 Not certified by Brunswick. Possibly working at some locations.  
Center Edge
(Vendor Site)
17.3.29.5754 17.3.29.5754 ?  2.8 Yes 1.9 Known working, but pre Brunswick certification. Dywon Terry
dterry@centeredgesoftware.com
Updated 02/03/2023

? ? See Notes 2.8 See Notes 1.9 Not certified by Brunswick. Possibly working at some locations.  

Givex POS
(Vendor Site)

Vexilor 1.0

POS Version 3.63

Vexilor 1.0

POS Version 3.63
Yes
2.8
Yes
1.9
Certified by Brunswick on 01/15/2020
 

Ideal POS
(Vendor Site

2.5.43 2.5.43  Yes 2.8 Yes 1.9  Known working, but pre Brunswick certification.  
Micros 3700
(Vendor Site)
4.3 5.7 Yes 2.8 Yes 1.9 Known working, but pre Brunswick certification.  
Micros 9700
? ?
Yes 2.8 Yes 1.9 02/27/2018 - Product is EOL per Oracle/Micros.
 
Micros Simphony
(Vendor Site)
N/A N/A Yes 2.8 Yes 1.9

11/05/2020 - Customer will need to purchase custom interface from On The Mark Solutions. Have customer contact developer below for costs:

Mark Tutt
President, Chief Software Architect
On The Mark Solutions, LLC
1-920-475-7178 x101
marktutt@onthemarksolutions.net
www.onthemarksolutions.com 

 
PAR Pixel
(Vendor Site)
12.x 12.x Yes 2.8 No N/A  Known working, but pre Brunswick certification.
 

PosiTouch
(Vendor Site)

6.4 6.4
Yes 2.8
Yes
1.9 Certified by Brunswick on 12/20/2020.
 
RTS Solutions - CinemaCon 7.1 7.1 2.8  Yes  1.9 Certified by Brunswick on 11/15/2018  
Vista USA 4.5.8.31 4.5.8.31  Yes 2.8 Yes 1.9 Certified by Brunswick on 10/1/2019  
Applicable Files:
N/A
Related Information and Links:
N/A
Revision Date:
02/05/2023 - Added support contact for CenterEdge.
05/14/2021 - Updated highest Micros 3700 support level.
03/25/2021 - Added PosiTouch to list of approved vendors.
11/05/2020 - Added updated information on Micros Symphony support.
01/21/2020 - Added Givex POS to list of approved vendors.
10/03/2019 - Added Vista USA to list of approved vendors.
11/16/2018 - Updated information to synchronize with Brunswick 300 site.
02/27/2018 - Added Aloha information and Vendor Note Section.
02/22/2018 - Updated chart with PosiTouch information.
11/08/2017 - Updated chart with Ideal and Center Edge versions.
11/01/2017 - Revising chart for VP/Sync and updating version information.
05/02/2016 - Added note of compatible Micros versions.
07/21/2015 - Initial Release
1.2.2. Center Edge POS
1.2.3. Givex POS
1.2.3.1. Givex POS/Brunswick POS Integration
Environment:
Vector Plus or Sync CNS with External POS Interface and Givex POS
Applicable Version(s):
VP 2.8 or later, Sync 2.3 or Later
Document Description:
Guidance document on Givex POS interface with Brunswick CNS.
Applicable Files:
Givex External POS Interface with Brunswick.pdf
Related Information and Links:
N/A
Revision Date:
01/21/2020 - Added to KB.

 
1.2.4. Micros POS
1.2.4.1. OTM Interface - Micros 3700 POS
Environment:
Sync CNS or VP CNS with Micros External POS Interface
Applicable Version(s):

All versions of Sync, VP 2.8 and later

Micros 3700 POS - RES 5.7

Document Description:
The attached zip file contains the OTM application for the Micros server and configuration instructions.
Applicable Files:
OTMS Brunswick RES 5.7 Interface Setup.zip
Related Information and Links:
N/A
Revision Date:
05/06/2020 - Released to Knowledgebase.

 
1.2.5. Vista USA POS
1.2.5.1. Vista USA/Brunswick POS Integration
Environment:
Vector Plus or Sync CNS with External POS Interface and Center Edge POS
Applicable Version(s):
VP 2.8 or later, Sync 2.3 or Later
Document Description:
Guidance document on Vista POS interface with Brunswick CNS.
Applicable Files:
Brunswick Item Connector.pdf
Related Information and Links:
N/A
Revision Date:
12/10/2019 - Added to KB.

 
1.3. Inventory Notification Systems for Sync
1.3.1. Approved Inventory Notification Vendors
Environment:
Inventory Notification Interface for Sync
Applicable Version(s):
Latest Sync CNS Version
Document Description:

The following vendors are approved for the Inventory Notifications Interface:

Inventory Management System Minimum Version  Certified Vendor Notes
Contacts 
YellowDogUnknown

Yes 

01/28/2022 - Initial service vendor, but has no certification on file.N/A
Optimum Control Inventory
5.0.20.0220YesCertified 02/28/2020.mkoss@tracrite.net
Orca Inventory
UnknownYes Certified 09/03/2021. minh@orcainventory.com
chris@orcainventory.com
Restaurant 365UnknownYes01/28/2022 - Certification not on file. dfronk@restaurant365.com
jmurdock@restaurant365.com
Growzer NVN/A Yes Certified 11/17/2022.frank@growzer.be

Applicable Files:
N/A
Related Information and Links:
N/A
Revision Date:
11/18/2022 - Added Growzer NV to list.
01/28/2022 - Released to KB.
1.3.2. Yellow Dog Software
Environment:
Inventory Control
Applicable Version(s):
Sync 2.2 and higher
Document Description:
Information on 3rd party inventory control software
Applicable Files:
See attachments
Related Information and Links:

https://yellowdogsoftware.com/

https://help.yellowdogsoftware.com/brunswick/ 

Revision Date:
05/15/2019 - Released to KB

 
1.4. Meriq Systems
1.4.1. Meriq Online Reservations
1.4.1.1. Configure Sync Deposit Accounts with Meriq Reservations
Environment:
Sync CNS with Meriq Online Reservations
Applicable Version(s):
Sync 3.8
Procedure:

This procedure is assuming Meriq has already connected to the system and configured Sync to interface with the Meriq reservation system online.

Create Account Category

  1. Open Sync Office
  2. Navigate to Analysis > Account Categories
  3. Click the + sign to create a new Category
  4. Name the category Online Reservations or something similar
  5. Click OK to save the new category
  6. Click Exit
Configure Online Reservation Deposits
  1. Open Sync Office
  2. Navigate to Sales > POS Policies
  3. Select the Reservations tab
  4. Click the drop-down for Default Online Deposit Collection type and Change to the one you created
  5. Click OK to save the change
At this point the system will automatically create deposit accounts for the Meriq reservations that are attached to the reservation.

The reservation deposits will be created with the reservation date and title from the reservation.  

Creating Payment Method

The next step is to create a payment method to allow for tracking of the incoming and outgoing funds.

  1. Open Sync Office
  2. Navigate to Sales > Cash Payment Methods
  3. Click the + sign to create a new payment method
  4. Name the method Online Deposits or something similar
  5. Check the Online Deposit Payment Method checkbox
  6. Click OK to Save the new payment method
  7. Click Exit
This will make sure all the sales reports properly account for the deposits coming into the system and being logged into the accounts. 
Applicable Files:
N/A
Related Information and Links:
N/A
Revision Date:
12/06/2022 - Released to KB.

 
1.5. TightVNC Software
Environment:
Brunswick CNS Systems
Applicable Version(s):

Computers running Windows Server 2003 or later

Computers running Windows XP or later 

Procedure:
The procedure below should be used for any Brunswick CNS computer that did not have TightVNC installed as part of the image.

  1. Download the attached installer and copy the file to the tools folder for the CNS system.
  2. Log into the computer under an administrator account (e.g. owner).
  3. Navigate in Windows Explorer to the tools folder and double-click the installer file.
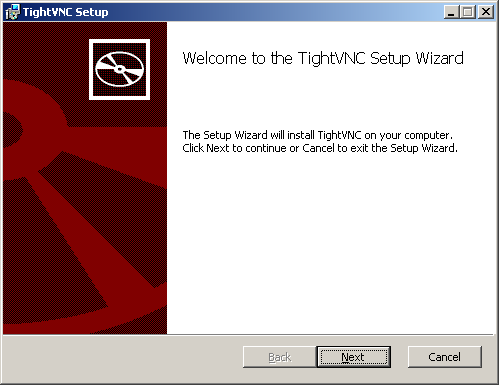
  4. When the setup screen appears click Next.


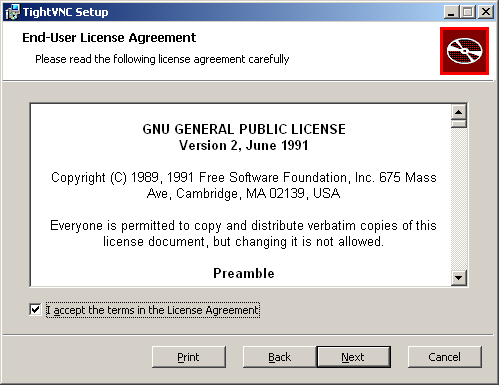
  5. Check the box to accept the license agreement and click Next.


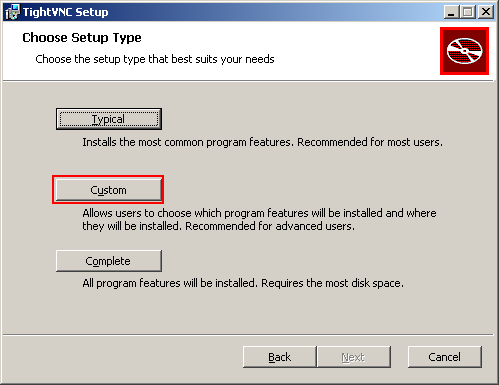
  6. Select the Custom setup type.


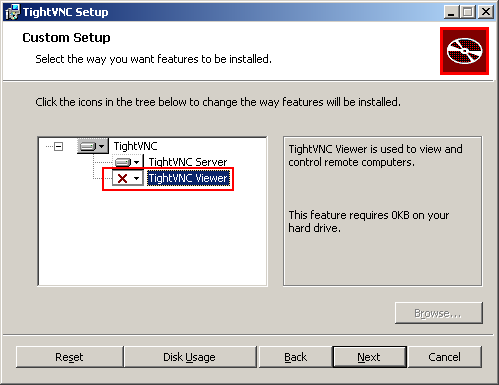
  7. Client PC's: Click the drop-down for TightVNC Viewer and select to not install, then click Next.
    Server PC's: Click the drop-down for TightVNC Server and select to not install, then click Next.


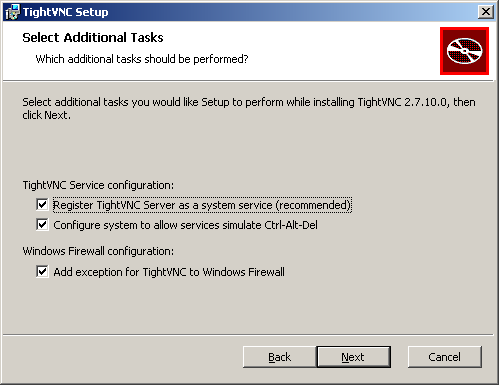
  8. Verify that all three options are enabled on the Select Additional Tasks screen, and click Next.
    Note: The values on this screen will vary depending on whether installing the Server or Client portions.


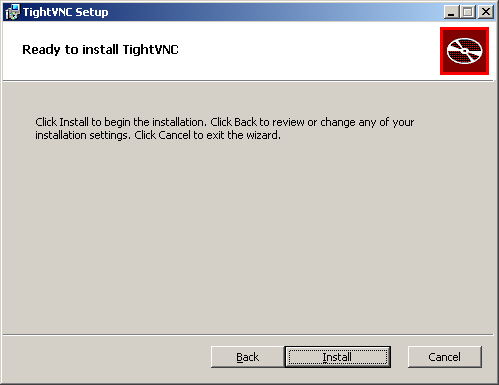
  9. On the Ready to install screen click Install to being the installation.


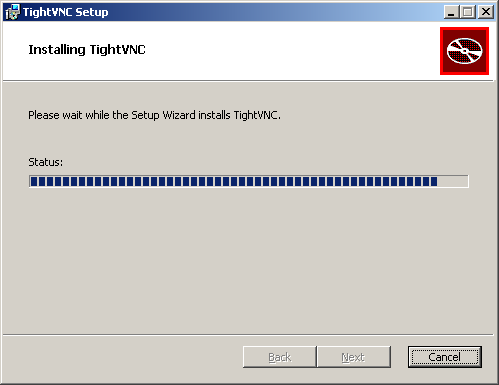
  10. The software will begin to install, which should take 2-3 minutes.


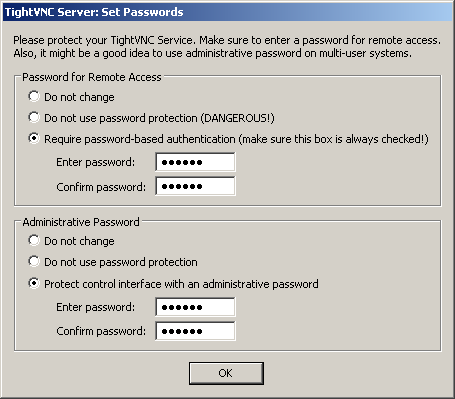
  11. As the installation completes, you will be prompted with the Set Passwords screen.

  12. Set the passwords to lower case:
    • "vector" for Vector/Vector Plus Systems
    • "sync" for Sync Systems
               
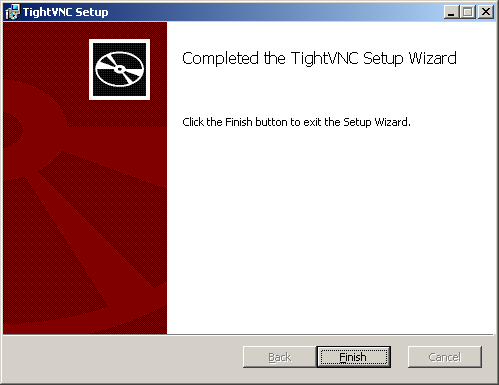
  13. Click Finish on the final screen to close the installer.
     
  14. You should now see the icon for TightVNC in the taskbar.      
Applicable Files:
32-bit Windows: tightvnc-2.8.27-gpl-setup-32bit.msi

64-bit Windows: tightvnc-2.8.27-gpl-setup-64bit.msi
Related Information and Links:
http://www.tightvnc.com/
Revision Date:

07/30/2020 - Updated to current 2.8.27 release from TightVNC.
10/15/2019 - Updated to current 2.8.23 release from TightVNC.
04/20/2017 - Added password information for Sync TightVNC setup.
09/16/2015 - Initial KB Release